Pages

Thursday, November 6, 2014

9 Things That Mess with Your Hormones


The seemingly innocent habits that throw your body for a loop.


Your Candy Bar Addiction
Eating foods with too much added sugar is directly linked to weight gain—and excess pounds can lead your body to become resistant to insulin, the hormone that moves sugar into your bloodstream so your cells can get the energy they need, says Holly Phillips, M.D., a women’s health specialist in New York City and medical correspondent for CBS News. The result: a precursor to diabetes called metabolic syndrome or even full-blown type 2 diabetes.


Stressing Out Late at Night
Normally, levels of the stress hormone cortisol drop at nighttime, which helps you wind down and sleep. But becoming anxious or tense in the p.m. means your cortisol levels keep surging, so you’re too wired to catch Zzz’s, says Phillips. Make sure one of these seven things that are secretly stressing you out aren’t putting you on edge, and be sure to try these anxiety-relieving tips.


Regular Bouts of Insomnia
It’s a vicious cycle: Lack of sleep raises cortisol levels, and cortisol cranks up your blood sugar…which then plunges, making you stressed and craving junk food, says Phillips. Start scoring more snooze time, and your cortisol levels will even out. These 15 tricks to sleep better should help.


Or Just One Night of Sleep Deprivation
When you sleep, levels of a hunger-related hormone called leptin surge, signaling to your body that you don’t need to eat. Toss and turn all night, and your body won’t produce the right amount of leptin—so you’ll feel extra hungry the next day and be more prone to weight gain.

Late-Afternoon Starbucks Runs
Cortisol is the culprit again here: Caffeine signals to your body to boost production of cortisol, which can make you feel anxious and definitely not in a sleep-well mindset. Limit yourself to no more than two regular-size cups of joe a day, preferably before 3 or 4 p.m.


Your Spotty Attendance at the Gym
Without regular exercise, your body won’t produce and release the optimal amount of endorphins, says Phillips. You know endorphins: They’re the feel-good chemicals in the brain that make you feel positive and alert. They also keep your immune system functioning well and increase levels of sex hormones so you score a libido lift. The more you move (cardio, Pilates, hiking, any kind of activity), the more endorphins your body will produce.

 
Crash Diets
A plunge in body-fat levels due to either a super low-calorie weight-loss regimen or intense exercise sessions lowers estrogen levels, halting your cycle until your body fat returns to a healthy level.

 
Skimping on Cardio
You know how a heart-pumping workout can make you temporarily forget about where to go for dinner? It has to do with the way aerobic exercise prompts a drop in levels of a hormone called ghrelin, which suppresses appetite, studies show.


Easing PMS With a Sweet Treat
Besides leaving you wired, sugar also does a number on brain chemicals that are already thrown for a loop during your PMS week. If your premenstrual symptoms leave you cranky and moody, sugar will just make you feel like more of a basket case, says Phillips. Instead of reaching for something sweet


Tuesday, November 4, 2014

7 Ways to Make Your Eyes Look Bigger and Brighter

There’s something so playful and sexy about big doe eyes—but you don't have to be genetically gifted to get them. Just use these tips from M.J. Forte, a New York City-based makeup artist, to fake big, bright eyes.

Go Light In The Corner
For eyes that pop, focus a light shadow on the inner-third of your eyelid, closest to your tear duct. “It makes your eyes look bigger instantly,” says Forte. The lighter color acts as a highlight to create an open appearance to the eye, making your eyes look larger, fresher, and more awake. Forte’s favorites are M.A.C. Cosmetics Eye Shadow in Yogurt and Vanilla ($16 each, maccosmetics.com).
Highlight The Browbone—But Not with Highlighter
Adding a highlight under the tail of your eyebrow on the highest part of your eye socket—the brow bone—will give mega-lift to your eye by drawing the attention up, says Forte. While you can definitely use the same shadow you would use on the inner corner of your eye, Forte recommends using a concealer. Go for a shade slightly lighter than your natural skin tone to illuminate the eye area. “Anything that’s lighter is going to brighten,” says Forte.
MORE: 3 Ways You Should Change Your Skin-Care Routine for Fall

Use a Layered Approach to Make Dark Circles Vanish
When it comes to big, bright eyes, any and all dark shades are the enemy. Forte says that the biggest mistake a girl can make is not concealing her undereye circles. "Darkness around your eyes will make them look smaller,” says Forte. Her concealing secret is to start with a pink-toned concealer before layering a yellow-toned concealer on top. She recommends Laura Mercier Secret Concealer ($24, sephora.com) as your base and Chanel Correcteur Perfection Long-Lasting Concealer ($40, nordstrom.com) for your second layer.
MORE: 11 Skin-Care Habits to Start NOW to Get Gorgeous Skin for Years to Come
Visually Extend Your Eyes
White liner opens up your eyes instantly. Use it on the inner rim of your lashes to extend the whites of your eyes and make them look larger and more awake with one stroke. Forte's go-to: M.A.C. Cosmetics Eye Kohl in Fascinating ($16, maccosmetics.com).

Rock a Nude Lip
If you want all eyes on your eyes, Forte says it’s important to keep the rest of your face as natural as possible. “Make your lips a lighter color because then the attention will be on your eyes,” says Forte. Her favorite for nude lips is Stila Stay All Day Liquid Lipstick in Bellissima ($22, sephora.com).
MORE: The 3 Lipstick Colors Every Woman Needs

Double Up on Falsies
There’s a reason those models in mascara commercials have that doe-eyed look. Forte says that she uses false lashes for all of the shoots she works to give the models a wide-open eye. In fact, she uses two sets of falsies instead of one. “I always layer two sets of lashes, one for length and one for thickness,” says Forte. This means serious drama in the eye area. Try Ardell lashes ($1.99-$5.49, ulta.com).

Lash Curlers Are A Must
Creating length coming up and out of the eye draws the focus away from the lash line, making the eye look wide open, says Forte. To achieve this effect, invest in a pair of lash curlers, and curl before applying mascara. Try Tweezerman Classic Lash Curler ($12.15, ulta.com). “They’re a lifesaver,” says Forte. “Every girl needs a pair.”

Wednesday, October 29, 2014

General Tso's Chicken

General Tso's Chicken
Weight Watchers friendly

PointsPlus® value | 8
Servings |  4
Preparation Time |  20 min
Cooking Time |  10 min
Level of Difficulty |  Moderate

 main meals |  You can enjoy this Asian classic by sautéing the chicken instead of frying it. The flavor's still there - just not all the fat.


Ingredients
  • 3/4 cup(s) canned chicken broth, reduced-sodium
  • 1 1/2 Tbsp cornstarch
  • 2 Tbsp sugar
  • 2 Tbsp low sodium soy sauce
  • 1 Tbsp white wine vinegar
  • 1/2 tsp ground ginger
  • 2 tsp peanut oil
  • 2 medium uncooked scallion(s), chopped
  • 2 clove(s) garlic clove(s), minced
  • 1/2 tsp red pepper flakes, or 1 dried chili pepper, minced
  • 1 pound(s) uncooked boneless skinless chicken breast(s), cut into 2-inch pieces
  • 2 cup(s) cooked white rice, kept hot
Instructions
  • In a medium bowl, whisk together broth, cornstarch, sugar, soy sauce, vinegar and ginger; set aside.
  • Heat oil in a wok or large skillet over medium-high heat. Add scallions, garlic and red pepper flakes; cook, stirring frequently, 2 minutes. Add chicken; sauté until browned all over, about 5 minutes.
  • Add reserved sauce to pan and simmer until sauce thickens and chicken is cooked through, about 3 minutes.
  • Serve chicken and sauce over rice. Yields about 1 cup chicken with sauce and 1/2 cup rice per serving.
 

Monday, October 27, 2014

11 Skin-Care Habits to Start NOW to Get Gorgeous Skin for Years to Come


Sometimes, being a creature of habit can work in your favor—at least when it comes to your skin. 


Going to a Dermatologist
If you haven't done so yet, book an appointment with a dermatologist in your area ASAP. Green says that having an expert on your skin works to your advantage in major ways. That way, you can get on a scientifically proven treatment plan that is tailored specifically to you. Regular checkups help your dermatologist keep track of changes in your skin, so your routine can change as your skin does.

Buying Products Meant for Your Skin Type
Combination, sensitive, dry, oily—knowing your skin's needs is half the battle, says Green. Each skin type requires different types of cleansers, serums, moisturizers, and treatments. Save yourself years of trial and error with products by asking your dermatologist what your type is.


Wearing Sunscreen
Green says nothing ages the skin quite like sun damage. For skin that will stay beautiful as you mature, wear an SPF 40 sunscreen underneath your foundation every single day. Seriously, your foundation's sun protection isn't enough. You'd have to use an entire bottle to match the power of a stand-alone sunscreen—so use both.


Using a Serum
If you don't have a serum in your skin-care arsenal, you're seriously missing out. They provide a concentrated dose of active ingredients that absorb into the skin lightning-fast. Look for one that satisfies your skin's needs, whether it's extreme hydration or pigment lightening. For a serum with intense anti-aging power,

Fighting Aging
Are you getting wrinkles from worrying about wrinkles? The minute you're aware that your skin is not perennially gorgeous, it's time to take preventive measures (after all, it's called anti­­-aging for a reason). Green says you should start looking for products that have anti-aging benefits as early as your 20s.


Researching Your Purchases
That $200 serum touting insane anti-aging claims? There's a fair chance it won't deliver on its promises. Many products that claim holy-grail results actually have little-to-no evidence backing them up, says Green. She recommends looking for evidence—such as clinical studies—before making a big investment.

Using Vitamin C and Retinol
The number one thing that Green's star patients have in common? They all use vitamin C and retinols in their youth. Vitamin C provides antioxidants and promotes collagen production, while retinol smoothes wrinkles and boosts elasticity. Incorporate both products into your routine to keep skin looking youthful.

Cleaning Up Your Diet
Unfortunately for your face, all of the toxins you put into your body (whether they enter via alcohol, cigarettes, caffeine, or environmental pollution) will eventually show up on your skin. Green's best advice? Limit your exposure as much as possible.


Sleeping with a Humidifier
Sleeping with a humidifier running every night can eliminate dry skin and help minimize environmental toxins.

Treating Yourself to Regular Facials
While they aren't a cure-all for your skin woes, Green says facials work wonders at restoring oxygen and moisture to the skin. Get one done by a pro every month or two, and find an at-home formula that you can use once weekly.

Being Gentle with Your Skin
Scrubbing your face won't solve your skin issues—in fact, Green says it will only make matters worse. Your skin is most receptive to products when they're applied with a soft touch in swooping, circular motions.

Saturday, October 25, 2014

7 Treadmill Mistakes You Might Be Making

Surprise: Running on a treadmill is not only about putting one foot in front of the other. With a few tweaks to your form, habits, and plan, you can get so much more out of your indoor running workout. The best place to start? Avoiding these seven treadmill errors:

Mistake #1: Not Having a Plan
You get on, you push "start," and you crank up the speed. You go until the timer hits your predetermined time (or your body hits the wall), and you stop. Not only is this workout uninspiring, it's definitely not pushing you to your potential. "You'll always do more work with a plan—always!" says LA-based running coach David Siik, creator of the Precision Running treadmill program at Equinox and author of a forthcoming book about running. "Find a one- to three-day-a-week routine, and make the commitment to put the work back in workout." (Need some help? Check out how to implement an interval or "hilly" treadmill plan here.) That said, following the same plan all the time isn't ideal, either. "The body limits gains when it isn't challenged in a variety of ways," says Sean Fortune, an NYC running and track coach and founder of Central Park Coaching. "Running fitness is earned by training the body with steady-state runs, progression runs, intervals, long runs, easy short runs, hill sprint runs, fartleks, tempos…" Not only that, mixing it up helps protect you from injury, so make sure you're regularly trying something new.

Mistake #2: Skipping the Warm-Up
"The biggest mistake I see by far is people going too fast too soon," says Fortune. "They start off from a dead standstill at a pace that is unsustainable, and inevitably slow down to a shuffle or start walking shortly after they begin." Instead, start by walking, progressively increasing to a jog for the first five to 10 minutes. After the first mile, you can crank it up if your workout calls for it. Not only will you not burn out this way, it's safer for your body. On a treadmill, "you can still pull something even though you are on a softer surface than the road," says Debbie Blair, running coach and board member of the Greater Long Island Running Club. The same goes for a cool-down—ease back out with five minutes of slower jogging or walking at the end.
MORE: Q&A: Which Burns More Calories: Running on the Treadmill or Running on the Elliptical?

Mistake #3: Ignoring the Incline
A gentle reminder: Treadmills have two variables—speed and incline. Too often, people just leave the incline at zero percent. Thing is, when you run in place indoors, you don't get the wind resistance or varied terrain of an outdoor run. To better approximate the challenge, do even your steady-state treadmill runs at a one- to two-percent incline. And when designing your workouts, don't forget to mix up the incline as well as the speed. Steeper work engages more of the glutes and hamstrings—and who doesn't want a better butt?

Mistake #4: Holding On
Grasping the sides (especially for dear life) is bad news for so many reasons. First of all, you're messing up your posture and your gait. You're also taking some of your bodyweight off your legs and not swinging your arms—effectively reducing your calorie burn. If you're grasping because can't keep up, slow down or reduce the incline. And once you are swinging, make sure you're swinging correctly—your arm drive is almost as important as what you do with your legs. "Using a small and swaying arm drive can cause you to rotate, and can eventually lead to all kinds of problems," says Siik. Instead, engage the muscles in your shoulders and arms to keep your arms parallel to your legs, never letting your hands cross your midline, or driving them so hard that your hands end up at the top of your head. Get it right and you'll reap major benefits: "A powerful leg and arm drive creates a great force that meets across your abdominals, giving you an incredible core workout—and a speedy path to a flat, tight stomach!" says Siik.

Mistake #5: Overthinking Your Stride
When it comes to your legs, we have some good news: Your body will generally figure this out on its own, without you overthinking it. However, sometimes people do over-anticipate a sprint, which can lead to too-large strides. "Be careful you're never reaching forward with your legs," says Siik. "It will cause your bodyweight to land in front of you, which is not so good for the knees." Also, when running on an incline, shorten your stride and increase your turnover—a.k.a., how fast you move your legs—to more efficiently conquer the "hill."

Mistake #6: Not Using the Whole Belt
The tendency to run right up against the rail is normal. After all, when that belt is moving at a pretty good clip, you don't want to fly off the end. "But running so close to the front of the treadmill can confine your legs and arms from running with their natural free range of motion," says Siik. So focus on utilizing the whole length, especially during a sprint when your stride opens up.

Mistake #7: Over-Controlling Your Breathing
Like your legs, your lungs are pretty freakin' good at their job. "Your body is far smarter than you give it credit for, and it will work to take in all the air it needs, instinctively," says Siik. "I see people all the time working on breathing exercise, trying to keep their breath under control when doing hard treadmill work. Stop!" That said, don't let the "panic" of a sprint send your breathing too shallow. To paraphrase those ubiquitous inspirational signs, stay calm and run on. Then, during the recoveries, slow your breathing with big inhales in through your nose and exhales out of your mouth.

Friday, October 24, 2014

Halloween Makeup 101: The Purrfect Black Cat


For this installment of Halloween Makeup 101, I'm turning to the ultimate classic: the purrfect black cat! It is a fail-proof look that can easily be paired up with black leggings and a blank tank or a full-blown leopard print jumpsuit. Best of all, this makeup look can be achieved with your regular makeup and the right black eyeliner.


1. Start with a natural makeup look for your base so you have a barrier of your normal makeup between the stage makeup, just in case there are any sensitivities to the more intense makeup.
2. Begin by adding an ivory shimmery eyeshadow like Naked in Virgin ($54) on your lids, brow bone and inner crease of your eyes.
3. Add a medium taupe brown shadow like Naked in Naked ($54) to the crease of your lids.
4. Draw on an elongated cat eye with a fine point brush and a black gel liner.
5. Continue the line on the lower lash line, making the outside line slightly thicker.
6. Add a set of false lashes of your choice.
7. Apply a generous amount of concealer underneath your eyes, bridge of your nose, chin, upper lip and your lips.
8. Contour the sides of your nose with a shadow brush and bronzer.
9. Add bronzer to the hollows of your cheeks.


10. Using gel liner and the same fine point brush, add dots to your cheeks and a cat nose with a thin line connecting to your upper lip, which you will fill in with black liner as well.
11. After the liner dries, smudge some of the concealer off of the center of your lower lip, exposing a little of your natural lip color.

  Meoowwww!!! Now get your best cat call, throw on some stilettos and you are ready to become the purrrrfect cat this year ;)


Thursday, October 23, 2014

Oily Skin? How to Choose and Use Foundation That’s Right for You

From treating breakouts to controlling shine around the T-zone, taking care of oily skin can be tricky. Another challenge? Finding an oil-absorbing base product that stays put past lunchtime. To help solve this foundation frustration, we turned to Derek Selby, International Director of Artistry and Education at Cover FX. (The entire Cover FX line is oil-free, so you could say he’s the guy for the job.) In addition to offering up some of his must-have makeup picks, Selby also shares tips for keeping oily skin healthy—while keeping excess grease in check. Hint: your cell phone needs a bath and white pillowcases are your new best friend.
Prepping the skin
“Foundation only looks as good as the skin underneath it,” says Selby, “and for oily skin, this means balancing the complexion’s natural oils, not stripping them away.” A simple skin care routine is best, Selby recommends, as too many products can make oiliness even worse. To start, use an exfoliant with salicylic acid, a natural ingredient derived from willow bark that has anti-inflammatory properties, and can be found in most acne-fighting cleansers. Selby recommends avoiding products with artificial fragrances added, too, because they can lead to breakouts.
And remember that proper hygiene is crucial for controlling excess oil—clean your makeup brushes regularly, wash your facecloths after every use, and don’t forget to sanitize your cell phone with an antibacterial wipe often. Selby also has a clever way of keeping tabs on your skin. “Sleeping on white pillowcases can tell you a lot about your skin,” he explains. “It’s easier to see oil and residue, and you’ll launder them more often.”
Finding your foundation
So which foundations are best if you’re prone to greasy skin? The answer is simple, according to Selby: a pressed mineral foundation. “About 90% of my clients with oily skin prefer this type of foundation,” he says. “It helps minimize shine and has a lighter, more natural look.” Cover FX’s formula is especially well-suited for oily complexions as it contains hydrating ingredients like vitamin F and omega 3 fatty acids, as well as kaolin, an oil-absorbing clay found along the Amazon. The key is to not overdo it. “People make the mistake of re-applying powder throughout the day as they get shiny, which just adds extra pigment and unnecessary coverage.” Translation: cakiness ensues. To avoid this beauty blunder, Selby tells his clients to leave the powder foundation at home, and instead pack extra blotting papers.
Try: Cover FX Pressed Mineral Foundation, Anna Sui Oil Control Paper & Case

Tuesday, October 21, 2014

The Best New Ways To Clean Your Makeup Brushes


                                            Breakouts. Poor makeup application. Ruined brushes. These are all things we’d rather dodge, right? Turns out, skimping on cleansing your makeup brushes and sponges can cause all of the above, as bacteria builds up on bristles — not cool for your skin or tools.

Of course, you can’t blame a girl for not being super enthusiastic about the process and putting it off for as long as possible. The whole thing is so hard to figure out, and, well, straight-up gross. There’s constant debate about what you should use to clean brushes: Is dish soap really okay? And, it feels like it takes an eternity to get all that gunk off your tools…and hands. Nasty. Oh, and waking up to still-damp brushes? The worst. Kiss any chance of decent-looking makeup goodbye.

Thankfully, the makeup gods have answered our prayers, and tons of handy new inventions are now on the market to make the process easier, quicker, and a little less disgusting. They’re so cool, in fact, that you’ll be looking forward to treating your tools properly. Click through to see the best of these holy-grail developments. Here’s to clear skin and longer-lasting brushes.
          

Wearing a glove means no germs or makeup residue on your hands. (Hallelujah.) You can use one side of it for face brushes and the other for eye brushes. On each side, clusters of differently textured bumps indicate cleansing steps: “wash,” “rinse,” “refine,” and “shape.” It’s shockingly effective — and you only have to go through the process once for your brushes to be squeaky-clean.
Sigma Beauty Spa Brush Cleaning Glove, $35, available at Sigma Beauty.

Love the idea of the Sigma glove, but looking for a little more hands-on control? The BrushEgg slips onto two fingers, so all of your digits aren’t restricted. This tiny tool — which comes in adorable pink and mint colors — is a simple two-step: The knobs on top are perfect for lathering, while the bottom grooves work hard to get all that junk out. You can use it with whatever soap you like.
BrushEgg BrushEgg!, $8, available at BrushEgg.

Ahh, simplicity. What could be easier than swirling your brushes atop this solid balm before running them under the tap? Plus, the incredibly gentle goat-milk formula will spoil your brushes and avoid irritating the skin. And, the smell? To die for. Who knew cleaning your tools could feel luxurious?
Japonesque Solid Brush Cleanser, $20, available at Ulta.

Are you a girl on the go? Then, you’ll love these non-alcohol wipes. Simply lay one of them onto a flat surface and brush your tools over it. They come in individually wrapped packets, so you can leave one in your purse, one in your office, one in your car...basically wherever you need to be on the daily. Be aware, though: These won’t replace your occasional deep-cleaning.
Sephora Collection Brush It Off Cleansing Brush Wipes, $16, available at Sephora.

Someone must have called this brand and ranted about every possible problem that crops up during tool cleansing — because, seriously, this kit’s got it all. Wash your brushes with the brush shampoo inside the textured cleansing cup and blot with the bamboo cloth. Next, wrap the included brush guards around bristles to keep them in place, and leave them to dry in the ventilated vase. Yup, we’re pretty sure it has everything covered.
The Brush Guard Cleaning Kit, $19.98, available at Ulta.

What else could you expect from a company known for its theater and special-effects makeup? Apparently, they’ve got removing it down to a science, too. The lid locks, so you can pump cleanser into the bottle, lock it for use, and swirl brushes around to get them super clean. You can also keep it locked in your bag while you’re on the go. No purse leakage? We’re in.
Graftobian Menda Brush Cleaner Fluid Pump Dispenser, $26.99, available at Graftobian.
The mysteries of brush-cleaning aren’t completely debunked without a solution for how to stop drying those babies out. Once you’re done cleansing, stick 'em into this upside-down contraption to dry them more efficiently and keep bristles from flattening or getting wonky. They’ll be good to go in just a few hours — no need for that next-morning panic.
Benjabelle Original Brush Tree, $34.95, available at Benjabelle.

Monday, October 20, 2014

Easy peasy tuna cakes

Easy Peasy Tuna Cakes
Minutes to Prepare: 
Minutes to Cook: 

Ingredients
1 5-oz can of no-salt-added tuna
1/4 cup panko bread crumbs (separated)
1/2 tsp spicy brown mustard
1 cup baby spinach
2 egg whites
2 tbsp ground flax meal
2 tbsp dried basil
1 tbsp white wine 


Directions
Drain the tuna. Wilt spinach and blot dry with a towel. (I cooked it in a pan, but you can steam it or microwave if you'd like.)

Mix all ingredients together EXCEPT the bread crumbs. Form into 4 equally sized portions. Roll each into a ball and press down to form each into a patty. Coat each side of each patty in the remaining bread crumbs.

Lightly coat a pan with non-stick spray. Over medium-high heat, brown one side for 3-4 minutes or until edges start to get brown, flip, and brown other side.

Serve warm.

Yields 2 servings, at 2 patties per serving.

Number of Servings: 2
Nutritional info for 1 serving
Calories 185
Fat 3.5
Carbs 8
Fiber 4  
Protein 27
Weight watcher points 4


Saturday, October 18, 2014

The Broke Girl's Guide To Fall Beauty products {part 3}

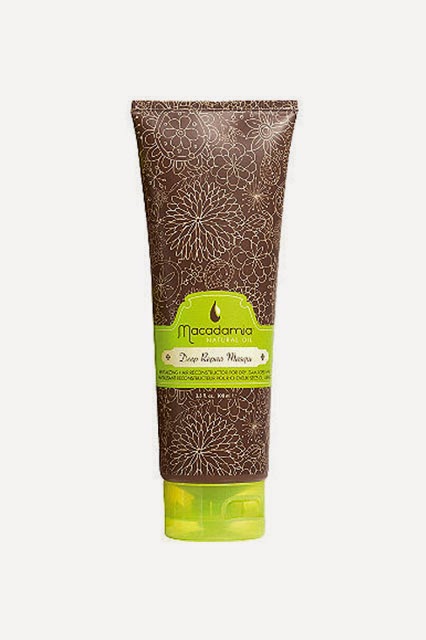
Mask "I am someone that uses a deep-conditioning treatment on my ends with every wash. I had heard of this brand, so I decided to pick this up at my drugstore and give it a try. I love it! It smells so yummy, and you can find it almost anywhere.” — Kylee Heath, celebrity hairstylist

Macadamia Natural Oil Deep Repair Masque, $16, available at Ulta.

Thermal Protectant
"I went to a Paul Mitchell hair academy, and this is one product I have never grown out of. It protects the hair really well, but also gives a slight hold, which means you don’t have to layer tons of product on afterwards.” — Kylee Heath
Paul Mitchell Express Style Hot Off The Press, $16.50, available at Loxa Beauty.


Styling Cream
“This offers flexible hold, touchable texture, and the perfect amount of shine with a delicious, coconut scent. A blowdry essential.” — Phillip Picardi
O&M Style Guru, $24, available at NET-A-PORTER.
Mousse
"Sometimes, a girl just wants a whole lot of body in her strands, and this is just the mousse for the job. It adds hold (but not too much!) and visibly plumps up your strands to create full, gorgeous volume that just won't quit. I like to apply it to dry hair before I use my curling iron to get big, bouncy curls that I brush out to create fluffy and full waves.” — Megan McIntyre
Toni & Guy Volume Plumping Mousse, $14.99, available at Target.


Anti-Frizz Product
"Anti-frizz products and fine hair are two things that usually don't go together: Mostly, because the majority of anti-frizz products contain smoothing agents that weigh down hair, which can make fine hair look limp, greasy, and straggly. That's not the case with this lightweight serum from Davines: It feels weightless, but it also has a mild texturizing effect, so you get a cool, second-day look along with a hint of shine and anti-frizz benefits.” — Megan McIntyre
Davines This Is An Invisible Serum, $22, available at Davines.
Hair Oil
"Suave’s oil is a lot less heavy than other hair oils, so it’s perfect for people who haven’t used one before. I like to work it into damp hair, after I’ve smoothed in a leave-in conditioner, for extra shine and reduced frizz.” — Maria Del Russo
Suave Moroccan Infusion Argan Styling Oil, $7.29, available at CVS.

Dry Shampoo
“This is just the best. It's a loose powder, not a spray, and you only need a pinch to make a mega difference.” — Gabrielle Korn
VERB Dry Shampoo, $14, available at Verb.
 

Beach Spray
"I couldn't have more good things to say about this texturizing spray. Unlike every other one I've tried, this doesn't make hair crunchy, sticky, or the least bit stiff. Instead, it creates truly soft texture and actually hydrates hair in the process. I was skeptical, but after just a few spritzes on my mane, I can't imagine using anything else. Did I mention the clincher? It can also be used as a hydrating body spray, has the most lovely, subtle scent, and costs all of $10. You don't own this already because…?” — Megan McIntyre
Olivine Beach Hair and Body Mist, $10, available at Olivine.


Kinky-Curls Styling Product
"I love this leave-in for very curly types, because it’s soft to the touch and doesn't weigh the hair down. The way it separates and defines the curl is actually long-lasting, and allows you to still touch the hair how you normally would without it becoming frizzy. I love it on set, because it can be used on both real and synthetic hair." — Paul Norton
Mixed Chicks Leave - In Conditioner, $19.98, available at Target.
Loose-Curls Styling Product
"This is a super fun curl enhancer that really adds a lot of bounce to the hair. It's really effective if you run it through damp hair, and then take small sections and twist with your fingers for a spiral effect before lightly diffusing with a dryer. It controls frizz so well that you can frequently play with your hair and even separate the curls once it’s dry.” — Paul Norton
Tigi Bed Head Foxy Curls Contour Cream, $19.98, available at Ulta.


Hairspray
"In truth, I don’t really see a difference between how this works compared to other hairsprays. But, this stuff smells so good, it’s worth the praise. Plus, it’s a backstage MVP." — Maria Del Russo
L'Oréal Elnett Hairspray, $14.99, available at Ulta.
Paddle Brush
"This is an awesome brush with boar-and-nylon combo bristles. It detangles wet or dry hair with ease, works super fast with a blowdryer, and is totally affordable. It’s great if you can't splurge on a Mason Pearson." — Kylee Heath
Sonia Kashuk Hair Brush, $15.79, available at Target.


Detangling Brush
“It’s the classic. But, you already knew that.” — Paul Norton
Tangle Teezer Salon Elite Styler Hairbrush, $16, available at Urban Outfitters.

Round Brush
"This is an awesome brush for a nice, voluminous blowout, because it allows you to keep constant heat on the hair while still protecting it. It has a mix of boar and synthetic bristles, which leaves the hair super shiny and helps to control [it] with less effort than most people are used to. But, as a pro, the weightlessness is my favorite part — it helps my arms when I’m blowing out super thick hair!” — Paul Norton
Bio Ionic Round Brush, $16.10, available at Amazon.